We all know Facebook is a great way to promote almost any business. You can easily attract your potential customers and clients by creatively designing your profile. Facebook does have some constraints that a designer must work within, but a good eye-catching timeline can surely help you to stand out from the crowd.
In this tutorial, I’ll walk you through the process of designing a gorgeous Facebook timeline cover in Photoshop. Along the way, you will learn how to make paper tags and the use of smart objects. Hopefully, you will learn some handy tips along the way. So, let’s get started!
Resources:

Step 1
Create a new document in Photoshop with an 851px width and a 315px height.

Step 2
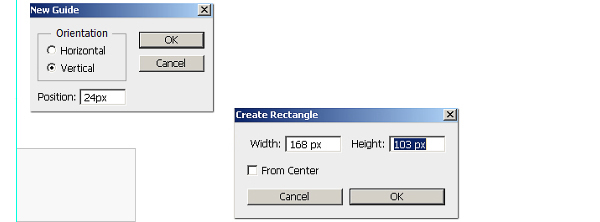
Next, we’ll define the cutout space that is used for the placement of your Facebook profile icon. Its width should be 168px, and its height should be 103px. Also, to fit Facebook’s design constraints correctly, the cutout space should be located 24px from the left edge of your canvas. First, we’ll position a guide 24px from the left border. So, go to “View” > “New Guide.” Use the values below for perfect positioning. Now, select the rectangle tool and click on the document. Use the guide below to trace the exact dimensions for the rectangle and place it on the guide as shown below.
Step 3
Now we can design the timeline cover with these constraints in mind. No design element should be present within this rectangle, as it will be covered by a Facebook icon once you’ve uploaded the design. Let’s begin the actual design work, starting with the background. Set #d2d1d0 as your foreground color and fill the background with it using the paint bucket tool.

Step 4
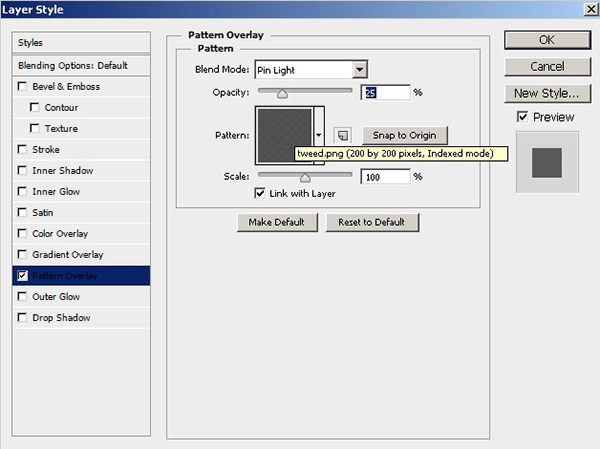
Next, we’ll apply a subtle pattern to the background. Open the pattern PNG file from the resources above in Photoshop or find your own subtle pattern.
Now, go to “Edit” > “Define Pattern” and label the pattern as you like. Come back to your document and double-click the background layer to open the layer style window. Apply the following settings for “Pattern Overlay”.
Now, go to “Edit” > “Define Pattern” and label the pattern as you like. Come back to your document and double-click the background layer to open the layer style window. Apply the following settings for “Pattern Overlay”.

Step 5
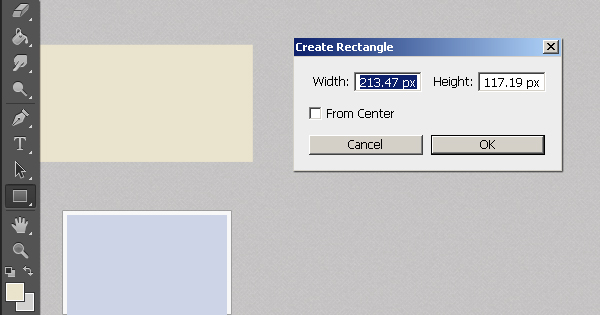
Now I’ll show you how to create a paper tag. Set #eae2ce as your foreground color. Then, select the rectangle tool, use drop down menu to select proportional. Enter the following values and hit “OK”. Label it as “Tag.”

Step 6
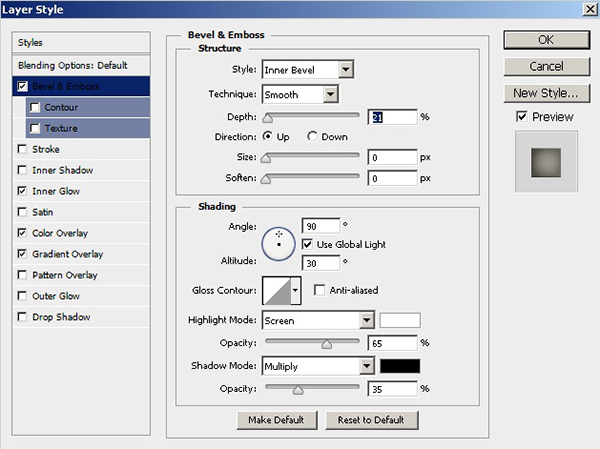
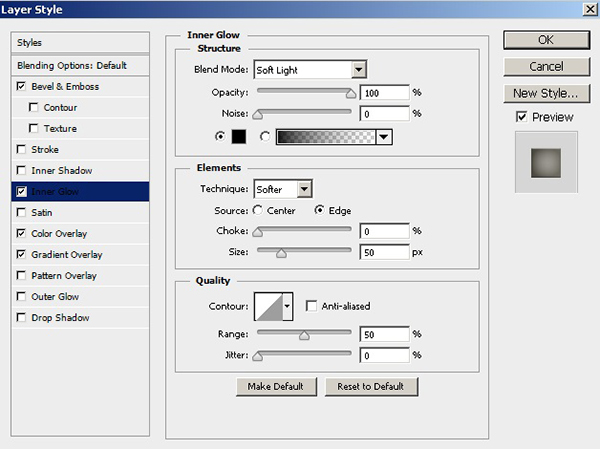
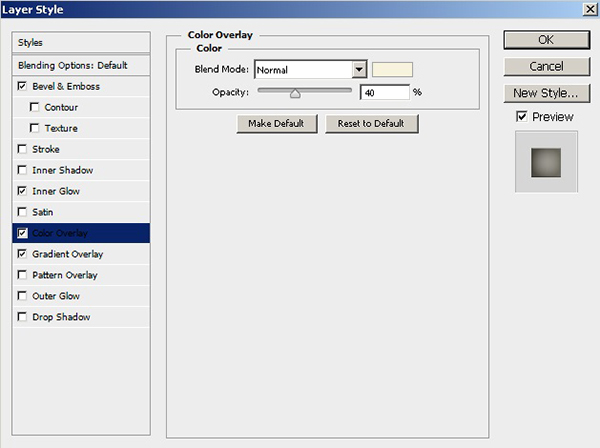
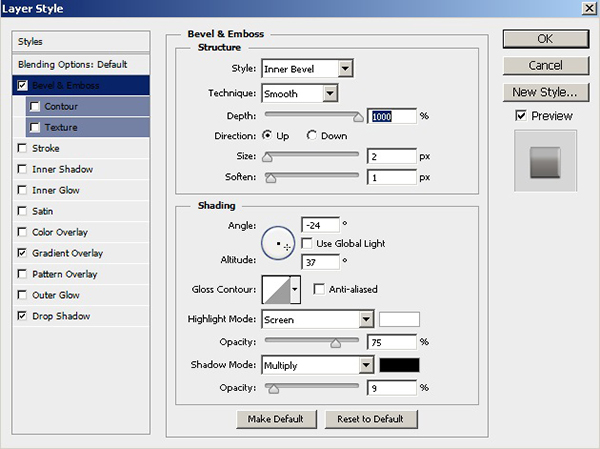
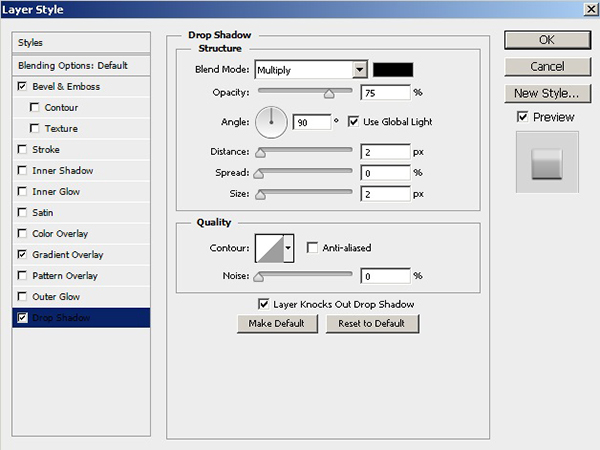
Double-click the tag layer and apply the following layer style settings on it.

Step 7
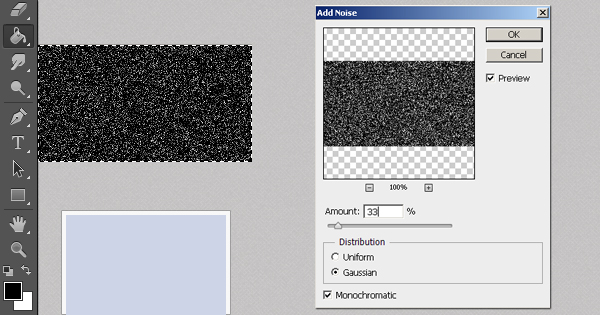
Next, we’ll add texture to the tag. Press Ctrl + <click on the tag layer> to make selection around it and create a new layer. Fill the selection with black using the paint bucket tool and go to “Filter” > “Noise” > “Add Noise.” Use the following settings here.
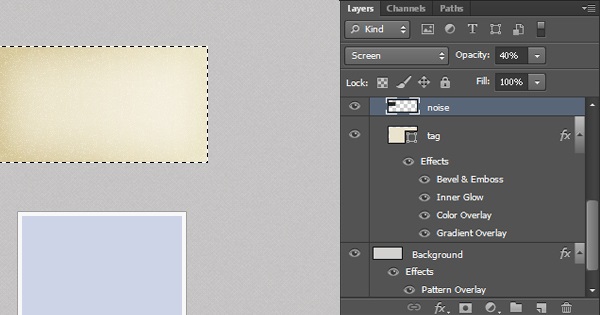
After that, change its blending mode to “Screen” and set the opacity to 40%.
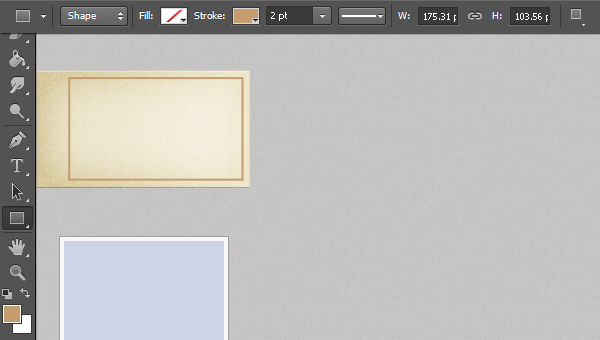
Step 8
Select #c59b70 as your color, select the rectangle marquee tool, and draw a small rectangle inside the tag. Right Click on the selection, click stroke and give it a 2pt stroke in the top options bar.
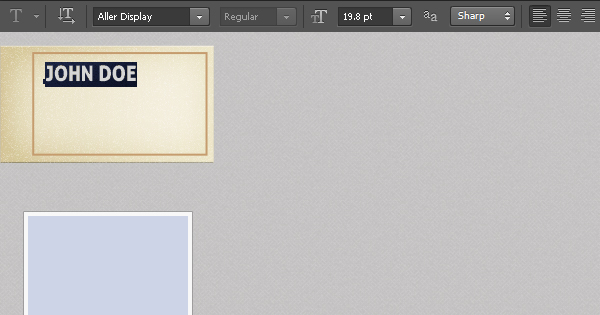
Step 9
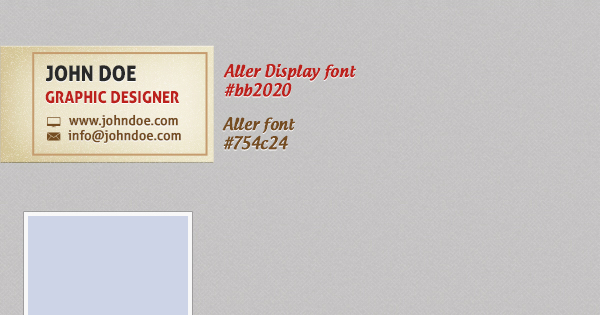
Now, we’ll add text over the tag. Select the type tool and type in the title text. I’ve used the “Aller Display” font here.
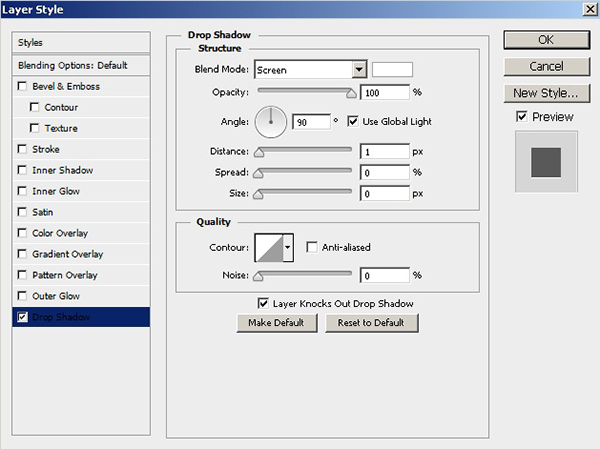
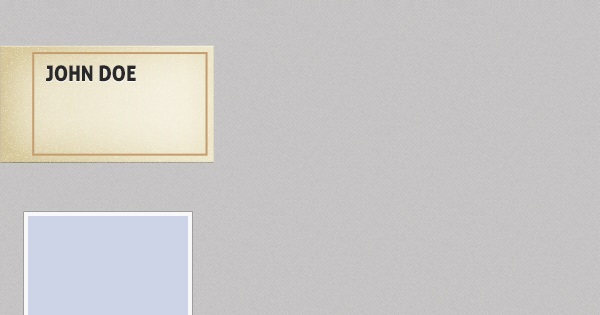
Step 10
You can add other details, but make sure to apply the same drop shadow settings to them.
Step 11
Next, we’ll make a hole inside the tag. To achieve this, make a small ellipse on the tag layer using the ellipse marquee tool. Place it centered on the left side. Click delete.

Step 12
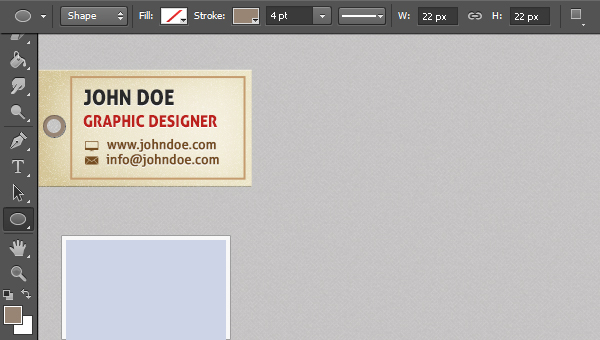
To make the metallic ring around the hole, use the ellipse tool and select the whole you just made. Change your color to #988575. Create a new layer label it as “Ring”. Then right click on the selection and make a 4pt stroke.
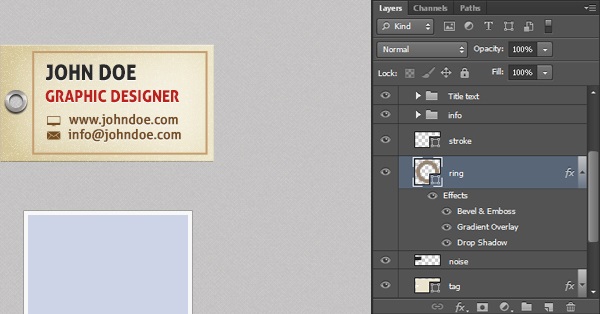
Step 13
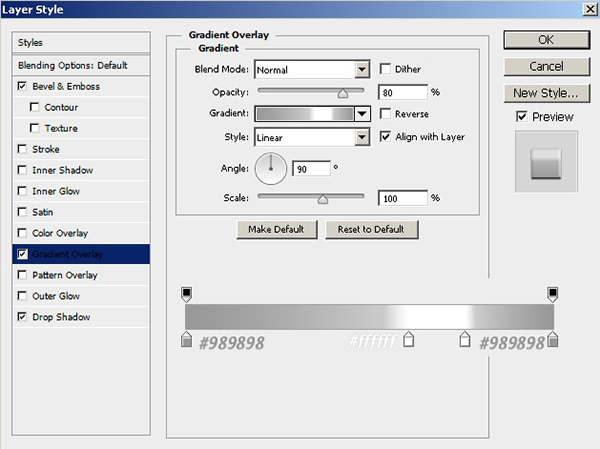
Apply the following layer style settings to the “Ring” layer.
Step 14
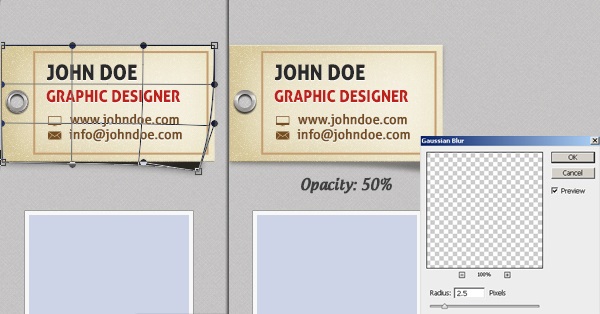
We’ll finish the tag by making its shadow. Duplicate the tag layer, change its color to black and place it just above the background layer. Now go to “Edit” > “Transform” > “Warp” and slightly drag its bottom right corner downwards. After that, go to “Filter” > “Blur” > “Gaussian Blur” and use a 2.5px value here. Reduce the opacity of shadow layer to 50%.
Step 15
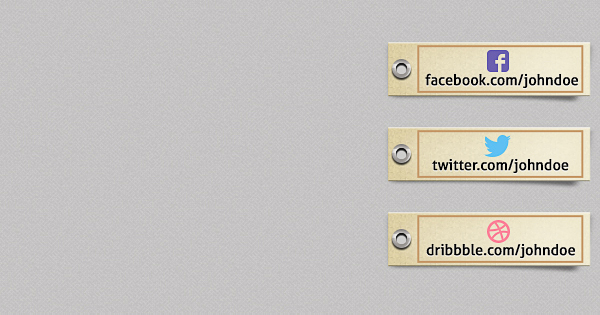
Next, we’ll make few social platform tags by duplicating the original tag. First, collect all the layers forming the tag in a single group. Duplicate it, delete all the text layers in the group, and select the tag along with its shadow and stroke layers. Now press Ctrl + “T” to activate the free transform tool and resize these layers to make the smaller tag shown below. After that, select the ring layers and resize them while holding “Shift” key to avoid any distortion and keep it in proper proportions.

You can add text and desired social media icon over it. Apply the same drop shadow settings on the text that were applied in the original tag text. Collect these new tag layers in a group and label it as “Facebook tag”.

Step 16
To make more tags, simply duplicate the Facebook tag group and position them as you like. You just need to edit the text and replace the icons accordingly.
Step 17
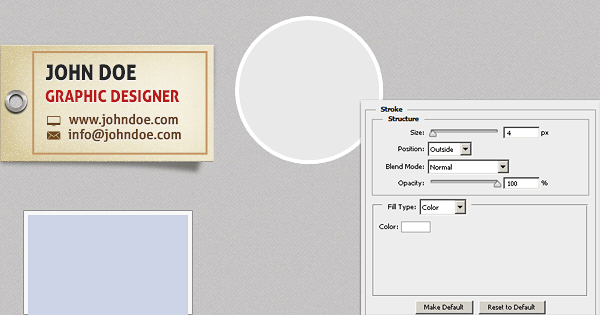
Next, we’ll create few circular frames where you can display your photos, portfolio, etc. Pick #e9e9e9 as your color. Now, select the shape tool ellipse, click on drop down menu & proportional ratio, put 400px for width and height. After that, right-click the ellipse layer and choose the option to “Convert to Smart Object”. Now, decrease the size of ellipse using free transform tool to make it fit within the timeline. Double-click the ellipse layer and give it a 4px white stroke.

Step 18
To place your image inside the smart object, double-click the ellipse1 smart object layer. A new document would open up. Now go to “File” > “Place” and select the desired image. And then go to “Layer” > “Create Clipping Mask” to confine the image in the circle.
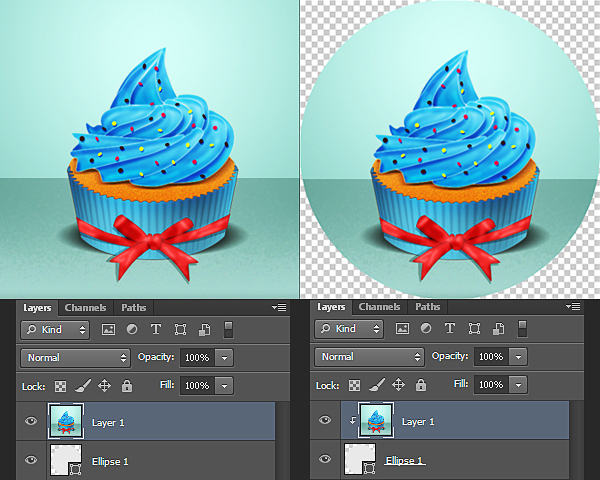
After that, go to “File” > “Save” and you are done.
Step 19
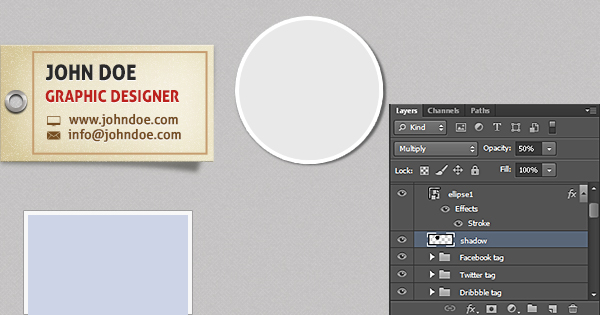
To make the first frame shadow, make an ellipse using the elliptical marquee tool just below the smart object layer and fill it with pure black. Apply a 1px Gaussian blur filter to it and drag it a bit to the right. Then, change its blending mode to “Multiply” and opacity to 50%.
Step 20
You can make a few more frames by following the techniques from step 17. You must repeat step 17 to make every new frame.; unfortunately, you can’t duplicate the previously-formed frame. However, for making their shadows ,duplicate the shadow layer formed in step 19 few times and position them just below their respective frames. Be creative to arrange these frames to get a varied unique outcome. Here is how mine looks:
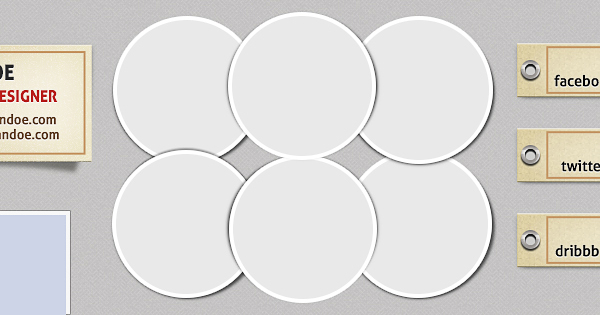
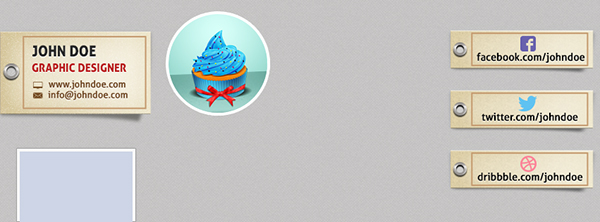
Here’s the final result after placing images within the smart objects.
That’s it! I Hope you enjoyed the tutorial and learned something new. Do share your thoughts!
No comments:
Post a Comment