Thursday, August 23, 2018

Optical Illusion Art with Crafts Class

Crafts Class
WHAT IS OP ART???


PLEASE TAKE NOTES IN YOUR SKETCHBOOK DURING THE POWER POINT AND DISCUSSION 


Bridget riley 


WHAT ARE THE BASIC SEWING TECHNIQUES WE WILL USE???


PLEASE TAKE NOTES IN YOUR SKETCHBOOK DURING THE POWER POINT AND DISCUSSION 


Monday, May 14, 2018

Take a Minute Monday...

Intro to Art Class:
What is something you make time to do everyday?  Draw me an example or several examples.  FILL UP YOU SPACE, be detailed, use class time wisely (stay off those phones), and be creative.

Computer Assisted Art Class:
What is something that you make time to do everyday?  Create a collage using photoshop.  Make sure to use different layers, blending modes, copy and paste, filters, and coloring and shading.  Use class time wisely, school is coming to an end so make it count!


Monday, May 7, 2018

Computer Assisted Art

Directions:  
Use the chart below to figure out your superhero or heroin.  Follow the demonstration.
Use photoshop skills (copy and paste, blending modes, filters, lasso tool, pen tool) to create a super here image.  Print out and Save.  Turn in to Mrs. Hurd on Thursday.
1.First find name on art blog.
Develop an idea.
2.  What do super heros/heroins look like, what accessories do they have?
Goggles
Capes
Masks
Leggings
Muscle Pads
Boots
Gloves
Gadgets
Weapons
Hats
Belts
Jewelry
Hair
Logo
3.  Begin creating in Photoshop.  Use copy and paste, blending modes, filters, lasso tool, magic wand, or the quick selection.


Think about what superhero costumes look like, what accessories do they have?


Wednesday, May 2, 2018

Crafts Tessellations

Directions:
1.  Today you will complete the Rythm, Pattern, and Contrast Worksheet, each person must turn in a worksheet but you may choose to work in groups.

2.  When everyone is finished we will Review your summaries in class.
3.  QuickStudy:  Fill each of the 6 squares with a different design using Pattern, Rythm, and Contrast.  


NEXT:
Try to create your own unique repeating pattern in the form of a tessellation.


Practice first by making a tessellation cube using the provided template.


tes·sel·la·tion
ˌtesəˈlāSH(ə)n/
noun
  1. the process or art of tessellating a surface, or the state of being tessellated.
    • an arrangement of shapes closely fitted together, especially of polygons in a repeated pattern without gaps or overlapping.

    See how there is a diamond shape, to begin with and then it is morphed into a repeating pattern that fits within the diamond?


Image result for tessellation templates   
You try to make your own tessellations.

Friday, April 27, 2018

Tuesday, April 24, 2018

Crafts- Crystals and Gems


Directions:
Use the pencil drawing that you created yesterday as a base.  You should have drawn light- if you did not, try to erase a bit, so you do not have any harsh pencil lines.  


Next- grab the desired watercolor pastels.  Begin by lightly coloring your crystals.  Add layers of colors on top of one another.  Don't be afraid to mix colors.  It is ok to be a little loose and scribbly at this stage.  Stear clear of using black!

Now it is time to add water.  Gather your supplies- Paintbrush, paper towel, water cup.  Dip your paintbrush into the water.  Use painterly strokes and go over the watercolor pastels.  You will see that they magically turn into paint and begin to blend.  Keep this up until you have turned all the pastel into paint.

Lastly, go over your dry painting with a dark marker or pen.  Outline your details.  Sign the bottom right corner.  Turn in to Mrs. Hurd.

Monday, April 23, 2018

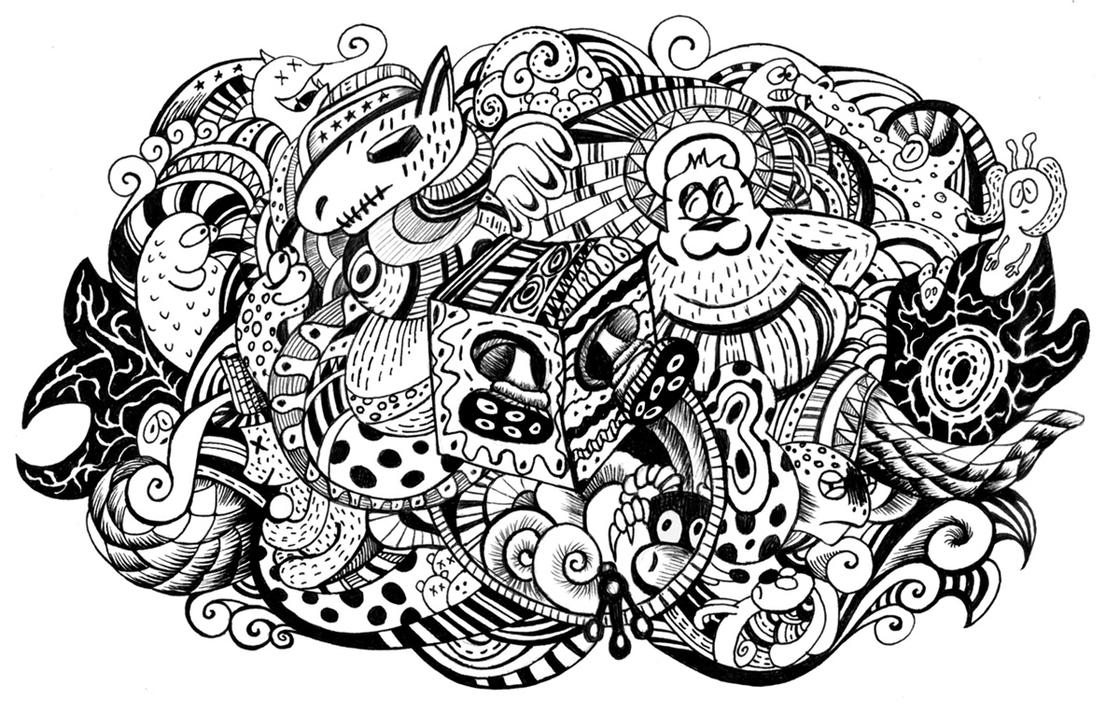
Computer Assisted Art DOODLE ART


MRS. HURD'S  DOODLE COMPUTER ART EXAMPLE


Step 1:

Create an interesting drawing in black and white.  Use pen and ink, or black marker.  Experiment with crosshatching, hatching, and sold black areas.  --FILL UP YOUR SPACE, USE CLASS TIME WISELY --  YOU HAVE 2 DAYS TO COMPLETE!


CLICK HERE TO LOOK AT EXAMPLES


DON"T WORRY ABOUT ADDING COLOR.  We are going to add color using the computer.

Step 2:

Turn doodles into Mrs. Hurd.  Mrs.Hurd will scan images and post on the blog for you to download.  We will then alter them in photoshop at a later date.
Maybe you will even learn how to create a gif.  like the above example in Photoshop.


Related image

Paper Mache Birds- Intro to Art

http://www.thatartistwoman.org/2018/01/valentine-lovebirds.html


  1.  Research your bird, and sketch out ideas.  Make sure you have a reference photo to look at.  Gather your supplies. 

You will need...
  • Cardboard
  • Computer Paper
  • Pencil
  • Scissors/Exacto Knife
  • Tape
  • Stapler
  • Reference Photo

   2. Use the computer paper.  Lay it over your sketch.  Trace the outline of the bird shape.  This will act as a template for when you cut out the cardboard.

 3.  Cut out the paper template.

  4.  Trace the paper template onto the cardboard.  You will need 2 pieces.  You can cut them out separately, or if the cardboard is thin enough you can layer one on top of the other and cut out both at the same time.

 5.  Cut out the 2 pieces of cardboard.  If it is thin cardboard you may use scissors if it is thicker cardboard you will need to use an Exacto knife.
Make sure you have something underneath the cardboard before you start to cut.  Hold the knife at a 45-degree angle.
  6.  You should have two pieces of card board now.

  7.  Begin to stuff the bird shape with wadded up computer paper.  Tape the wadded paper into place.  
  8.  You should have something that resembles a sandwich.  Cardboard, paper, cardboard.

  9. Staple the edges- SPARINGLY- tape the rest to enclose the edges.

10.  Now you are ready to paper mache.

Wednesday, April 18, 2018

Computer Assisted Art- Words

Directions:  DO NOT BE NEGATIVE-TRY BEFORE YOU COMPLAIN
This is a creative exercise.

Today we are taking a break from the computers, and we are going to create art using mirror writing.
First, grab a sheet of sketchbook paper.  Follow along with the video, to practice and get a "feel" for writing backward. 


Now, grab a sheet of drawing paper.  Write down a short poem, slogan, saying, song lyric or etc...using backward writing (Mirror Writing) with big bold overlapping letters.  Add an interesting frame around your words.  Color in the spaces created with analogous colors (Neighboring Colors on the color wheel).  What do you see?  What did you create?

Drawing Class Prompt

Directions:
1. Find an image with a great silhouette.  Think about the positive and negative space of that object.
2. Copy and Paste the image into Microsoft word.  3. Find an interesting font on dafont.com.  Use the PrtScn button on your keyboard and copy and paste the font into Microsoft word.  Make sure both fit on one page.  Print it out.  We will start drawing when everyone has completed the computer task.


Literal Art Papercuts - Waunakee Community School District - Sophie Wagner-Marx   Artsonia Art Exhibit :: Pictorial Calligraphy  Kelsie374's art on Artsonia   Check out student artwork posted to Artsonia from the Pictorial Calligraphy project gallery at Southgate Anderson High School.Literal Art Papercuts - Waunakee Community School District - Sophie Wagner-Marx

Tuesday, April 17, 2018

Spring Birds- Introduction to Art

Directions:

Students will research birds.  Students will choose a bird.  Students will create a research page in their sketchbook.  Answer questions, and write down interesting facts.  Students will also need to print a picture of the bird (copy and paste into Microsoft Word or Google Doc and resize), and glue pictures onto the sketchbook page.  You decorate fonts, make the page look good- showcase your art skills!! 👍😎


  • What is the name of your Bird?
  • Where does your bird normally live?
  • What color is your bird?
  • What are any distinguishing features of the bird you chose?
  • Why did you choose the bird?
  • What are some interesting facts that you learned about birds in general from your research (list at least 5 facts).

Thursday, April 12, 2018

Typography Basics

Inspiration Images:
The "art" of stress.
Levi's ad

typographic posters - Google Search


Directions:

Use the type tool in PS to create an interesting poster design.  Your poster needs to have a wide range of texts/fonts, as well as text going in all sorts of directions.  You will also need some kind of graphic/graphics in your poster.

You will need to find...
a graphic/picture
a font or fonts that you like in PS
a quote
You will use the type tool and the pen tool for this project.

Think about balance, and creating a good composition.  Remember that odd numbers are more pleasing to the eye.

Image result for the element of balance