TEXTURES TO USE ON ANDY WARHOL INSPIRED PROJECT:
DIRECTIONS: Right click and save below images. Save in your folder or google drive. Open in Pixlr. Click select all. Click copy. GO TO ANDY WARHOL PROJECT and Click Paste. Change Opacity and or blending mode.
Benday Dots
Canvas
MRS. HURD'S FINSIHED EXAMPLE OF ANDY WARHOL STYLE PORTRAIT USING PIXLR.
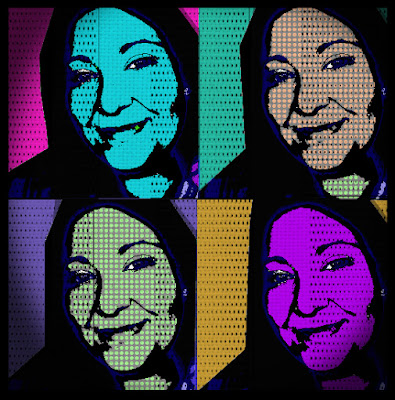
DON'T FORGET TO SAVE YOUR PROJECT FOR YOUR PORTFOLIO PROJECT AT THE END OF THE SEMESTER!
Yesterday Recap (Wednesday): Threshold & Sizing
1. Find image and save to personal folder (right click, save image as).
2. Open image using pixlr.com (click file, click open)
3. Select Image using the marquee tool
4. Copy Image
5. Create new canvas titled Pop Art Portrait, 800x600
6. Paste image into new document (Edit, Paste)
7. Resize image- Edit, Free transform, enter to get out of transform
8. Use move tool and place in corner- Repeat until you have four equally sized, square images.
9. Adjust the threshold of each image. Make sure you are on the correct layer.
10. Save as a pxd file to your personal folder or google doc.
 Today (Thursday): Color & Stamp Effect
1. Open PXD pop art portrait file using pixlr.com/editor
2. If you have a black background you will use the lasso tool to delete it. It is the second tool icon from the top right tool panel. Each time you click it will anchor the lasso in place. You must trace back to where you started and it will turn into a selection. Once it is selected, hit the delete key. Now you can use the move tool to move the selection around to each layer, and delete the background-without having to retrace with the lasso tool each time.

3. Google Andy Warhol Pop up prints for a reference.
4. Now use the paint bucket tool, and the color selection tool to fill areas with solid color.
5. Now its time to create a stamp effect. Make the original image layer visible, and all other layers invisible. (If you had to delete your background earlier, do that again.)
6. Click Adjustments Click brightness contrast. Adjust with slider bar.
7. Click Adjustments Click Posterize.
8. Click Adjustments, Click Invert
9. Click Adjustments, Click Hue Saturation, Click Colorize,
10. Select with marquee tool, click Edit Click Copy. Make all other layers visible, and paste what you just created on all four images. This will give it the "stamped" effect.


